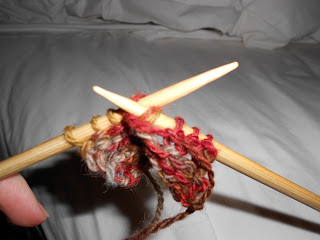
After finishing my first real piece of lacework, I wanted to have a go at a more complex pattern. I eventually produced the following, which is probably the biggest test-swatch ever:
I'm probably going to send this to my mother to make into a kidney-warmer as she is always complaining of having cold kidneys.
For the pattern I had another quick look on Ravelry, didn't find anything I liked, then simply Googled 'leaf lace kntting' or something. This pattern for a scarf looked lovely and claimed to be simple. I can verify both! Instead of casting on 39, I initially cast on 120, did a knit-3-purl-2 ribbing border to start, decreased one every twenty stitches, and then repeated the pattern across in three sets. When I'd done nine sets in total I did another knit-3-purl-2 rib border, and cast off. My holes are a lot bigger than others who have tried the pattern, as I am using the wrong size needles for my wool.
Stiches learned in this pattern included two different kinds of decrease stitch. The SKP (slip knit pass) or skpsso (slip, knit, pass slipped stitch over) speaks for itself; it's a mini cast-off essentially. The p2tog tbl (purl two together through back loops) is more complex. As I mentioned last post, it was my granny who showed me what the back of a stitch was, and now that I have my new camera I can show you!
This is the front of a stitch:
And this is the back:
To start a p2tog tbl, find the two back loops by turning the left needle round towards you and scooping up the backs right-to-left (purlwise). Then purl them together as usual.
Casting on in large numbers without losing count, and making sure that I started each of my sets in the right place, was greatly helped by the use of these little stitch-markers.
Stitch Markers
You Will Need: Medium-sized beads with large holes, yarn of a contrasting colour to the working yarn, scissors
Pass the end of a bright yarn through the bead, and make a triple granny-knot across your index finger to preserve the loop. To use, slip a marker onto the needle at a landmark point or every 20 stitches when casting on. As you come to them in your knitting, simply pass the marker from left needle to right and ignore them, carrying on with your pattern. They will follow you up the work. If they occur between two stitches to stitch together, pass the first stitch to your right needle, remove the marker, pass the first stitch back, make the k2tog or p2tog or whatever, and replace the marker on the right needle.


No comments:
Post a Comment