Pages

Sunday 26 September 2010

Embroidery 'sans frontieres'


It's easy to get scared by the idea of doing embroidery; needles are both fiddly and pointy, mistakes are easy to make and difficult to attend to, and it isn't often done these days so guidance from elder relatives can be sparing.  However - after an obsessive cross-stitch phase in my childhood, I became determined to take up my needle again, and so I offer this pictorial evidence of what you can achieve without a pattern from a kit.

Learning to sew in itself is a bit tricky for me to show you just on a blog, but there are lots of books and old people around who could teach you the basics.  For masterpieces such as above, You Will Need:  Scissors, fine white cloth of any kind, coloured embroidery thread (try John Lewis), needle, small embroidery hoop (ditto), computer and printer, pencil and strong black pen.

Decide on your image.  I wanted a goldfinch because birds make good stand-alone subjects and come in interesting colours.  A great tit was abandoned after the embroidery hoop pulled the pattern out of shape.  Print out your images in black and white or colour and trace them with the black pen onto a separate sheet.  If you can't see the image through the paper do your best to sketch from example with your pencil, then go around the outlines with the pen.  Cut out the pen drawing.

Place the drawing behind the cloth and fit the cloth into the embroidery hoop so that you can see the pattern through the cloth.  If you can't, hold it up to a window or light to remember your way.  Make sure that the hoop is aligned properly and the cloth pulled tight.  Begin sewing with fine black thread, using backstitch, along all the outlines.  

When you've finished the outlines of your image, you don't need the paper pattern any more.  Take the work out of the embroidery hoop and carefully cut or pull away the paper from the back of the work (if it won't come easily, no worries - it won't show later).  Most of the edges will have been nicely perforated by your sewing earlier.  When the paper is mostly or all gone, put the work back into the hoop and fill in the blocks of colour using long and short stitch.  

This way you can make any image you like, or even, if you're a better draughtsman than a sewer, design your own.  For a first try choose a small, simple subject which doesn't have too much fiddly detail.  There are three key things to remember about doing needlework of any kind:

1) Never use a thread longer than your own arm.  When pulling from a bobbin or skein, hold the body of the thread in one hand near your chest, pull out the length you need with your other hand, and stop when your arm is fully extended.  Cutting the thread with your teeth means that the end is already wetted to push easily through the needle, and you don't have to let go to get your scissors.  When you have this long thread, pull about half of it through the needle so that you're only working with a short length at a time.

2) While you're sewing, occasionally let the thread lie on the surface of the work so you can see it curling up.  Then twiddle the needle in the opposite direction until the thread lies flat.  This reduces the chance of tangles happening when you pull through the material.

3) If you do get a tangle, don't panic!  Either snip it out, which is cowardly but effective, and remember to tuck the cut ends under new stitches so that they don't unravel - OR - very slowly tug on each loop and you may find that the culprit is one small loop which simply undoes when the thread is gently pulled taut.  Then dangle your needle to untwist the thread and start again.

Wednesday 22 September 2010

Chutney update...

So, the slow cooker may after all have been a bad idea.  Its small base and lid have not been conducive to the evaporation of the vinegar; perhaps next time I shall add even less vinegar than I did - half-quantities - to speed the process.  After boiling for 7 hours, the chutney has now been jarred in good ol' recycled honey pots, sterilised by washing and putting in an oven heating up to 150 degrees C.  Hopefully once it's cooled, it'll look thicker than it is.

Mek Chutney all daaaay...

'Bees make honey, and this is an amazing thing - we never think about it but it's an amazing thing!  Do spiders make gravy?  Do earwigs make chutney?'
from the Cottage Smallholder website

I have paraphrased, but this is Eddie Izzard's wonderful stance on chutney, which I have decided to make myself.  I am not an expert earwig, so I have turned for my chutney recipe to a wonderful blog called the Cottage Smallholder.  Their recipe for plum chutney can be found here, and I have a batch of it (minus the apricots, as I didn't have any) in the slow cooker at the moment.  I am using half the amount of vinegar specified, as the slow cooker tends to conserve a lot of the liquid in any dish.

I ought here to mention two people who will have made this chutney possible.  My wonderful boyfriend D (who also prompted the invention of a chutney rather than jam, as he loves cheese) bought me the slow cooker for a birthday present about two or three years ago, for cooking at university.  It has served me well during that time, and I am delighted to discover on the internet that it may be possible to slow-boil such preserves in one rather than on the hob.
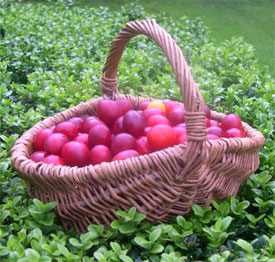
The second person is my friend V the Bearded Bat-Woman of the Night, who allowed me to plunder the extensive orchards of her Oxfordshire home for damsons, yellow plums, hard pears and cooking apples.  I shall be trying to condense this plunder into multiple jars of multiple kinds of jam and chutney over the following days, for multiple purposes.

Sunday 19 September 2010

Leftover Apple Tartlets


Remember that I told you to save the cocoa pastry from the Exploding Blackberry Tart? These little babies use the leftovers from making that, and any Bramleys you have left over from making jam, to avoid waste and encourage tastiness...

Leftover Apple Tartlets

Preheat the oven to 180 degrees C.  Grease a cupcake tray.  Roll out your remaining pastry to about 2-4mm thickness and cut into circles with a floured wineglass (if, like me, you don't have round biscuit cutters!)  Bake these cases for 5-7 minutes, then take them out again. 

Meanwhile, peel and core the apple(s).   Slice off very thin slices equal to the number of cases you have (I had seven.)  Put these aside for later.  Very finely chop the rest of the apple, put in a saucepan with a splash of water, a knob of butter and generous sprinkle of sugar to cover the surface.  Cook, stirring gently, until mushy, then add to the pastry cases.

Place a slice each of reserved apple over the filling, and sprinkle with more sugar.  Bake another 5-10 mins until the apple is hot and browned at the edges.

Fin!

Sunday 12 September 2010

Blackberry and Apple Jam


Jam jam jam, jam jam jam, nom.... eugh....

Black Books quotes aside (if you don't know what I'm talking about, go and find out) this jam is definitely not eugh.  It is my mother's own recipe, and I have been highly aware of its production since a very young age.  I first remember picking blackberries specifically for jam at a place called Hole Cottage, once owned as a holiday home by the Landmark Trust but now I believe sadly sold.  It was during our stay there, chopping and fetching wood for the real fire, reading a lot of books, going on a lot of walks and drinking tea from the (always identical) Landmark Trust tea-set, that the Blackberry Jam Song was first composed.  The brambles, as always, were full of spiderwebs, the path, as always, along which they grew was strewn with the detritus of passing dog-owners, and Mum sang out to us wee ones as we worked:

'Spider-jam, spider-jam,
nur-nur-nehneh, Spider Jam
Mind the poo - on the path
or you'll have to, have a bath
Watch out!
Here comes the Spider-Jam,'

to the tune of Aerosmith's Spider Man.  It became a firm favourite immediately, and in honour of the incident I have labelled the first two bottles of my blackberry liqueur 'Créme d'Araignée,' or 'Spider Liqueur.'

Mrs. Dawson's Blackberry and Apple Jam (proportions)


4 lbs (spiderless) blackberries
1/2 pint water
1.5 lbs peeled, cored, finely sliced cooking apples
6 lbs caster sugar
(knob of butter - I missed this by accident, but it seems to be optional.)

EDIT: Thanks to the interwebs, I now know that the knob of butter is apparently added at the last minute to reduce the appearance of scum, but I didn't spot any on mine, so do as you like.

Put a small saucer in the freezer with a couple of icecubes on it.  Trust me, you'll need it later.

Simmer the blackberries in 1/4 pint of the water until soft, which won't take long.  Simmer the apples meanwhile in a larger pan in the rest of the water until soft, then mash them.  Add the blackberries and the sugar to the apple pulp, stir til the sugar has dissolved, (then add the butter.)  Bring to a rolling boil and boil 10 mins.

TOP TIP:  At this point the whole thing will become Extremely Bubbly as you can see in the pictures and difficult to stir without injuring oneself.  I ended up wrapping a teatowel around my hand to protect myself from boiling sugar splats.  It disturbed me somewhat that I never saw Mum doing this, but perhaps she used a longer spoon.

After 10 mins take the saucer out of the freezer and blob some of the jam onto it.  Does it bind together into a  proper jammy blob when cooled?  If not, just keep boiling a bit more.  If so, skim any scum off the top of the jam, and pot into clean jars.  If you don't have clean jars, as I didn't, endeavour to make some, as I did:

Tuesday 7 September 2010

Exploding Blackberry Tart


This tart is a complete experiment, which worked extremely well!  The pastry is a lovely flaky version of a recipe which usually uses ground almonds instead of cocoa.  You could probably easily use both, or just almonds if you fancy a less brown tart.  You'll need some basic ingredients as well as some of your blackberries; I'm afraid to say I didn't measure the weight of the berries I used, so you'll have to guess, but if you have too many left over then you can do what I did with mine the next week...make jam!

For the Pastry:


c.30cm tart tin
200g butter
pinch salt
40g icing sugar
40g cocoa powder
1 egg
teaspoon vanilla
c. 200g plain flour

Cream the butter, almonds, sugar and salt.  Add the vanilla, beaten egg and 1 tablespoon of the flour.  Slowly incorporate the rest of the flour to make a ball of dough which comes away cleanly from the sides of the bowl (use more flour if need be.)  Wrap in clingfilm and fridge for one hour.

Preheat the oven to 180 degrees C.  Roll out the dough to a circle about the size of the tart tin, flouring the rolling pin, pastry, surface and your hands very well.  Use this technique to get it into the tin:
http://www.bbc.co.uk/food/techniques/lining_tin_with_pastry
Prick the bottom of the pastry base all over with a fork; this will allow any air bubbles trapped underneath to escape and not make unsightly lumps in your bottom :)  Bake for 10 minutes while you mix up the sponge.

TOP TIP:  If you have any pastry trimmings left over from making your tart base, wrap them up in clingfilm again, and keep in the fridge to make Leftover Tartlets - coming up in a new post soon.

For the sponge:


1 large egg, beaten
3oz butter, plain flour, caster sugar
handful of dessicated coconut or two

Cream the butter and sugar, and gradually add the beaten egg.  Stir in the coconut, then gradually add the flour to make a smooth batter.

To assemble:


Take the tart base out of the oven, and spoon in the sponge mixture, spreading it out evenly.  Now sprinkle over some blackberries, washed of course, until the surface is evenly covered with fruit.  Stick it straight back in the oven for about 25 minutes, or until golden brown and exploded. (by which I mean the individual fruits will have burst, spilling their lovely flavours into the sponge!)

While it's cooking you could melt some chocolate to drizzle over the top, or take some vanilla icecream out of the freezer to make it easier to spoon alongside.  Bon appetit!

Monday 6 September 2010

Ways with Blackberries and Elderberries: Liqueurs

Blackberries.  We all know and love eating them, especially in crumbles, pies and jam - which I made later, as you'll see.  But this year's harvest was motivated by that finest of things: strongly flavoured, sweet, ladylike ALCOHOL.

At a party many weeks ago now I ordered a Bramble from the bar, a combination of Bombay Sapphire gin, lemon juice and blackberry liqueur - Creme de Mures.  Don't ask me the proportions, all I know is that they're delicious and I shared my love of them with some friends.  One said that it was tasty, but that she'd prefer a vodka-based drink to gin, not being a gin fan.  From then on my quest was sealed - I must make Sue some blackberry vodka, and some thicker, more traditional creme for making my own Brambles at home!

To the interwebs I went, and scoured many websites (most of them, to my despair, American, and obsessed with 'cups') to find the best recipes.  With these in mind I scoured many bushes on Wimbledon Common, looking for the blackest and least spider-covered fruit.

TOP TIP:  When you are going blackberrying, take with you a very large container - even if you don't fill it it's easier to chuck berries into from a small distance without missing - and the kitchen scissors.  With these you can manipulate thorny branches and cut away large leaves to reveal hidden berries, and reach your hand through to gather in safety.  If possible, don't wear a Gore-Tex raincoat as I did, they catch thorns worse than anything on the planet.

Along the way I also managed to chop down many bunches of elderberries from nearby carparks.  Pluck these in entire bunches and de-stem in the kitchen, or if you need more room in your containers take a break from harvesting to bibble the berries off at leisure on a grassy knoll.  Don't eat the red or green ones - they're a bit cyanidey, but the ripe black ones are fine!

Haha!  Bounty collected, I applied conversion charts to the wretched 'cups' of my recipes and acquired the requisite amount of alcohol and sugar.  I now present the two recipes I used, each delicious in its own way, each suitable for scaling up or down to suit your own harvest.

Creme de Mures with red wine


1.5 kg blackberries
2 litres of good red wine
large amounts of sugar

large tub
large bowl
large saucepan
FUNNEL
bottles

Soak any labels off the bottles.  Wash and crush the fruit, add the wine and 'macerate' (basically soak) for 48 hours.  You should be able to do this in the tub you used to gather the berries.  Weigh a large bowl; filter the juice into it and calculate the weight of the juice.  Add the same weight of sugar to the liquid.  Bring to the boil and boil for five minutes; allow to cool, and bottle.  A funnel is essential; place the bottle on a wad of kitchen paper to make clearing up spills easy, or bottle over the sink.

Creme de Mures with Vodka


1kg blackberries
1 litre vodka
1/4 litres water
350g sugar

Wash and crush the fruit, add the vodka, and macerate 24 hours.  Strain, reserve the vodka, and put the strained fruit into the water for another 24 hours.  Strain this mixture and add the sugar to the water.  Mix with the vodka, and bottle.

Elderberry Cassis


Remember those elderberries?  Well, I was also looking at cassis recipes, figuring that if anything was a kindred spirit of these tiny black fragrant fruits it was blackcurrants.  Unfortunately I shan't know until November, following the recipe, whether my experiment with elderberry cassis was successful, so I shall save that post for later.  At the moment I have two bottles of vodka filled with slowly paling berries, the liquid getting purpler and purpler every day.  It looks promising....!

Thursday 2 September 2010

Waste and Plenty

A break from knitting now, as I make the most of the summer harvest.  In the next few weeks I'll be posting five recipes using blackberries, elderberries and apple which I've been testing out this August.  Unfortunately in my desire to use up a disposable camera so that I can show you photos of these creations, I'll have delayed posting until the end of the berry season - but there's always next year!

Where I live there are innumerable old-fashioned Victorian and Georgian houses, all with a little garden, and there is a huge amount of fruit going to waste in those gardens.  From my flat I can only dream of having a real apple or plum tree to harvest; even a crab apple tree would provide jelly to serve with meats.  The Christian Science Church on the main road has a sloe tree in their front carpark; the branches of dull bitter berries are too high for me to reach without a scrumping ladder, and the fruit which might have gone to gin is rotting on the pavement, squished by passing women with buggies.  Elderberry bushes are rampant in front yards and back yards everywhere.  It is simply criminal.  None of these lucky, lucky people are taking advantage of the free jam, pudding and liqueur-making facilities at their command!

I address my plea to the Internet at large.  Soon it will be September, and almost all but the apples will have gone, Summer's bounty withered for another year.  Next year, when you see a red or purple glint on that bush that leans over the fence, investigate it properly.  If the bottom of the bush belongs to you, go to it!  If it doesn't, bring a ladder, and drop me a line...